Quick Mix Guide
The process of mixing is simply the method of working through every instrument, carefully refining the sound, and checking it against everything else in the mix.
It is important to understand that mixing is an abstract, subjective process. What works well for one artist may be totally alien to another.
Whether mixing from the beginning, or from a fresh perspective at the end, many good mixing engineers believe that the best results in mixing come from having a vision at the start.
Knowing a direction for where the song is going helps keep focus and provides a goal to aim for at the end.
Mix from the Ground Up
Although there are no set rules from where to build a mix from or how to start a mix, it is a good idea to work through the song as if it were a building.
Start with the foundations; the bass and drums, and work upwards. The only exception to this is the vocal, as it is the most recognized element in a song. It's worth fading the vocal in every now and again to check it against the other sounds, or you could try mixing it into the track as soon as possible.
Get Familiar with the Song
If mixing from scratch, it is vital to get familiar with the song. Listen to the track over and over; understand the arrangement areas, sounds, and dimensions.
Push up all the faders and listen to each part and how it contributes to the whole mix. Keep a similar commercial record handy to compare the mix with; it will serve as a vital reference point to aim for throughout the mix.
Keep an eye on the meters:
- On an analog desk, peaks should not exceed +3db
- On a digital mixer, never go over 0db.
Whether mixing a rock, pop or dance track, always keep your ears open to all possibilities. The more control over the mix you have, the better you can assemble the overall image.
Work with effects and processors to polish the image until something special emerges.
Bass - The Muddy Problem
Although bass is often desirable in music, it can be problematic when mixing. If there is too much bass present in a mix it will sound muddy, indistinct, boomy, and muffled.
There are two tricks that can sort out bass problems:
- Cut bass frequencies that are not needed. The muddy frequencies around 250-400 Hz build up fast and are a sure sign of an inexperienced mixing engineer
- Cut all the sub-bass frequencies below 50 Hz for bass sounds and cut even higher for non-bass sounds, such as percussion. This will free up mix room and make the sound punchier
Mixing a Rock Song
Below is a quick mix guide for instruments based on a standard rock band comprising of a drum kit, bass, lead guitar and a vocal.
Remember, that with all mixing, the suggestions are only guidelines that should be experimented with.
Kick Drum

- Position the kick drum dead center, and keep it dry with no reverb
- Add some high ratio compression to ensure that it does not keep wondering in and out of the mix
- Use a noise gate if there is a lot of spill from the other drums
- Boost around 70 Hz for body, and 3 kHz for added attack
- Low cut any frequencies below 50 Hz
- For added warmth, route the kick through a tape distortion unit and tweak the settings as desired.
Snare Drum
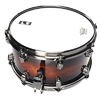
- Position the snare drum dead center.
- Add some reverb to fatten up the sound.
- Apply some fast attack compression to keep the snare prominent and punchy throughout the song
- Try a small boost of equalization at around 60-120 Hz to add power
- For a more snappy sound, boost around 6 kHz.
Toms
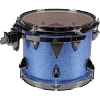
- Position the toms anywhere between 3.00 and 9.00 o clock
- Add a small amount of medium reverb
- For fullness boost around 250 Hz
- For more attack, boost around 6 kHz
- Add a noise gate to the toms if there is a lot of leakage between drums
- Add some compression to even out the dynamics.
Cymbals

- Position the cymbals to either side at 3:00 or 9:00 o clock
- Do not push the cymbal fader too high as loud cymbals can spoil an entire mix
- To add brightness try a small boost around 3 kHz
- To add air, boost around 12 kHz
- To increase the decay time, add some long decay reverb
- To even out the dynamics add some mild compression.
Hi-hats
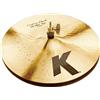
- Position the hi-hats anywhere between 2:00 and 10:00
- Any apparent muddiness can be rolled off around 300 Hz
- To add some brightness try a small boost around 3 kHz
- A short gated reverb will make the hi-hat sound bigger in the mix
- A timed step delay positioned the opposite side can help aid the rhythm.
Bass

- Position the bass dead center, and keep it free from any reverb
- Add some high ratio compression to keep it prominent in the mix
- Try boosting around 60 Hz to add more body
- Any apparent muddiness can be rolled off around 300 Hz
- If more presence is needed, boost around 6 kHz
- Apply a low cut at every frequency below 40 Hz to free up mix room.
To keep the bass and kick tight, give them different prominent frequencies. For example, if the kick peaks at 65 Hz make sure the bass peaks somewhere else.
Vocal

- Position the vocal dead center
- Add a low cut around 150 Hz to eliminate rumble and plosives
- Apply some more cut 300 Hz and above 13 kHz if needed
- Add a small boost around 6 kHz to add some clarity, and also at around 350 Hz for warmth
- Notch out some mid-range at around 800 Hz
- To even out the dynamics add a compressor with a medium ratio setting
- Applying some subtle delay can add interest
- Add some reverb as desired.
Rhythm Guitar

- Position the rhythm guitar off-center at 10.00 or 2.00
- Add some short plate reverb to liven up the sound
- Use a low cut filter at 200 Hz to rid any unwanted bass
- Add a small boost around 3 kHz to add some edge to the sound (or cut to add some transparency)
- Try boosting around 6 kHz to add presence
- Applying a timed step delay can help fill out the sound
- Make sure the rhythm guitar is not competing with the vocalist’s fundamental frequencies
- Try adding some distortion to give the guitar added bite
- Chorus can help give the guitar a fuller sound and blend it into the mix better.